Kayak Rudder Kits: Top Picks & How-To Install
Installing a kayak rudder kit is one of the best and most affordable modifications you can make to a kayak, whether you are a recreational paddler, touring kayaker or like to fish from your kayak, you will benefit from a rudder.
Most kayaks don’t come with a pre-installed rudder. Mainly because they aren’t essential, however, most kayakers will agree that once you have used one, you’ll never go back to kayaking without a rudder.
Table of Contents
Universal Kayak Rudder Kits at a Glance:
- Borogo Universal Kayak Rudder Kit With Control Line
- HoomBoom Kayak Rudder Kit
- Bullnose Rudder Clamp for 24-55 Trolling Motors
What is a kayak rudder, and why install one?
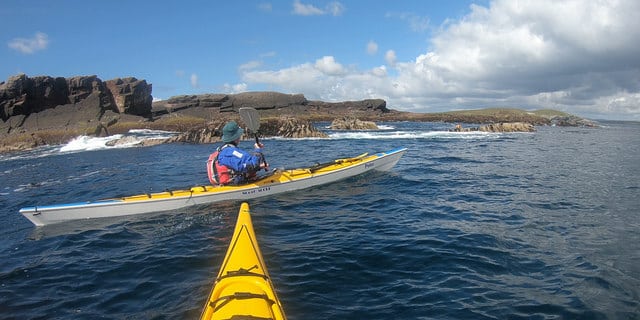
A kayak rudder is a blade that is mounted at the stern (rear) of the kayak. It can be lowered into the water to give you more control over your direction and maneuverability.
Some kayaks will come with a rudder kit pre-installed, however, this is usually only by request, and most kayaks will need you to mount a rudder yourself. Luckily, universal kayak rudder kits make this process fairly straightforward and painless.
Kayak rudders are typically controlled by handles or pedals from the cockpit.
They are particularly useful when you are kayaking in windy/choppy conditions, or in water where there is a strong current. Rudders help the kayak track straight and maintain the desired direction.
Most kayakers have been out in the wind, you’ll probably have noticed that the nose of the kayak will want to face the wind direction, this is referred to as ‘weather-cocking’. This is because the stern of the kayak is free to move and sideways wind will blow it away from the wind direction, causing the kayak to turn into the wind.
Rudders can help to negate this effect. It won’t steer the kayak for you, but give you more control of your own steering and general kayak direction.
Best Kayak Rudder Kits
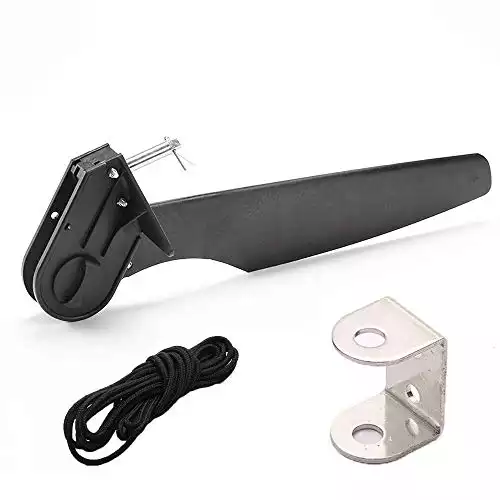 Borogo Universal Kayak Rudder Kit With Control Line
The first kayak rudder on our list can be installed on a wide range of kayaks and boats, it includes a stainless steel mounting bracket that can be attached to the hull.
The kit includes a rudder produced from durable nylon, a cord to secure the rudder in position, and a stainless steel mounting bracket.
As with most kayak rudder kits, it can be used with steering cables for foot operation, however, a steel cable and tubing kit will need to be purchased separately.
Specs:
- Material: Nylon & 304 stainless steel
- Pin size: 1.8 * 0.4in(L * D)
- Rudder blade length: Approx. 17.7in
- Size: Approx. 18.5 * 6.1 * 5.6 in (L * W * H)
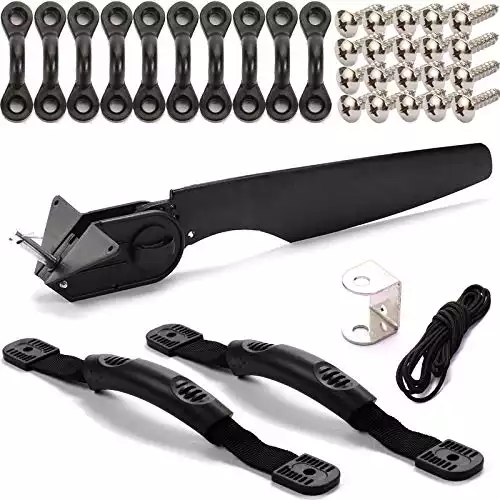 HoomBoom Kayak Rudder Kit
This kayak rudder kit is universal and has been designed to fit most hard-shell kayak sterns using the included stainless steel mounting bracket.
The kit also includes a securing cord, carry handles, tie-down eye brackets to secure the cord to your kayak, and all necessary screws.
Installing the kayak rudder kit is very simple using the bracket, although foot-operated steering cables will be required seperately.
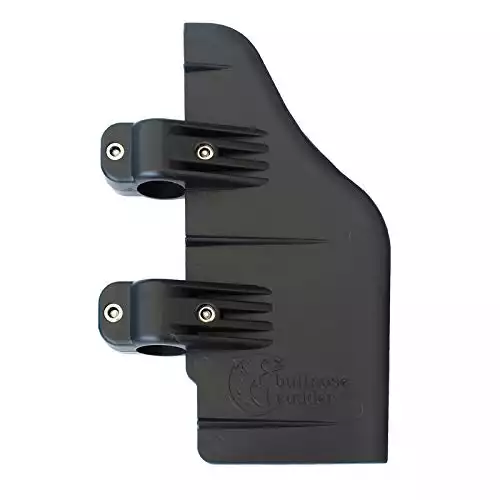 Bullnose Rudder Clamp for 24-55 Trolling Motors
This kayak rudder is designed to be mounted on the shaft of a trolling motor.
Trolling motors are notorious for lack of steering especially when the water is choppy or you want to track in a straight line.
Simply adding the Bullnose Rudder to the shaft of your trolling motor and notice a significant improvement in steering when it comes to maneuvering your kayak, pontoon, or canoe.
The Bullnose rudder fits any shaft that measures 1 1/8" in diameter no matter the thrust including the Minn Kota, Edge, Maxxum, and Fortrex motors.
Additional Kayak Rudder Accessories:
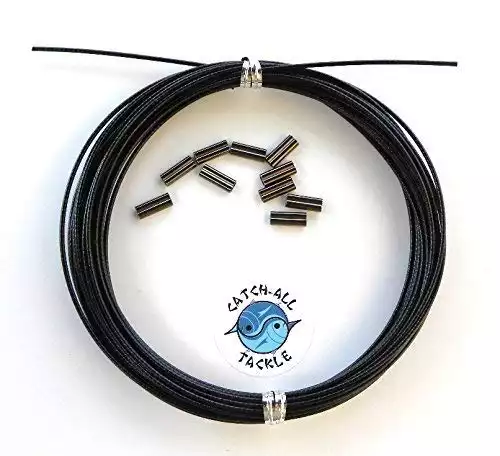 Stainless Steel Black Vinyl Coated Cable Kit 30' With Crimps
Vinyl coated cable kit used to attach foot pedals to kayak rudder kit for hands-free operation.
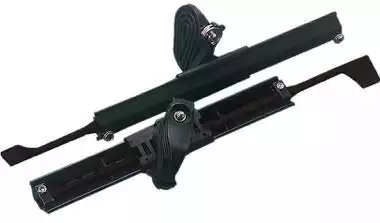 Sea-Lect Designs Adjustable Foot-brace With Rudder Control
Adjustable kayak foot pedals with built-in rudder control.
Buyers Guide: Choosing a Rudder Kit For Kayaks
Kayak Rudder vs Skeg
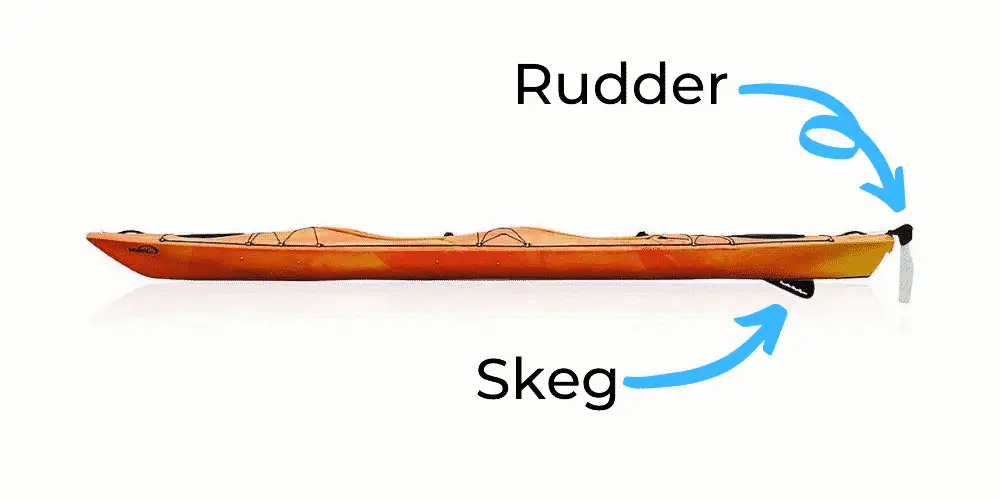
As mentioned earlier in the post, rudders attach to the stern of the kayak. They are designed to pivot from side-to-side and can be controlled via handles or foot-pedals in the kayak cockpit. Rudders lift out of the water and can be secured using a cord system.
Skegs aren’t attached to the very rear of the kayak, instead, they are positioned inside of a slot in the hull, however, still towards the kayaks’ stern. Skegs do not pivot as a rudder does. They can be lowered and retracted, usually via a slider in the kayak’s cockpit.
Rudder Pros & Cons
Pros:
One of the biggest advantages of a rudder compared to a skeg, is that it can be controlled by your feet whilst you are kayaking. The dual-movement of the rudder and your kayak paddle allows for better control and maneuverability in windy conditions.
Another pro of a kayak rudder kit is that it helps you to conserve energy. To move forward you want to be putting your energy into… forward strokes. If you spend the majority of your time and energy making corrective side strokes to re-align your kayak then you will soon burn through your energy stores.
I remember heading out on Coniston Water, a couple of summers ago. Unfortunately, my rudder broke in transit and I had to kayak roughly 12 miles in windy conditions without it. I must have used more energy trying to keep my kayak tracking straight, than actually moving forward!
Because rudders pivot side-to-side, you can adjust them to help negate any effects of weather-cocking from strong side winds.
Cons:
The biggest con of a rudder, that isn’t as apparent on a skeg is the chance of failure. Whether it be a mechanical failure or accidental damage. There are more moving parts with a rudder; the pulley system to retract the blade, the blade itself swivels, and the cable/foot-pedals. All can become a failure point.
Rudders also ‘get in the way’ more than skegs. They are hanging off the back of your kayak, and if you forget, and crash your stern into a structure, your rudder will likely break.
These issues are only minor, and can often be avoided with good buying decisions, proper install and care whilst kayaking.
Skeg Pros & Cons
Pros:
Skegs are still a great way of improving your kayak handling in windy conditions, and they are less prone to mechanical and accidental damage than a rudder. There is less risk of collision damage as they are mounted under the kayak (just be cautious in really shallow water).
Some kayakers who are interested in maintaining the aesthetically pleasing look of their kayak shape may als prefer skegs as they are not visible once in the water.
Another pro, that is often overlooked is the simplicity of a kayak skeg – you kind of ‘set it and forget it’. No foot pedals are adjustments are needed. And it still does a pretty good job of improving your tracking.
Cons:
We’ve already mentioned that skegs are less effective than rudders, but what are some other cons?
Firstly, the skeg box can take up some storage space in the stern of your kayak – the skeg has to retract into somewhere.
And, skegs can be installed after you have purchased your kayak, but it is more difficult than installing a universal kayak rudder kit, because you will need to cut and seal a slot in the hull of your kayak. Where as most kayak rudder kits just bolt or screw onto the kayaks stern.
How To Install a Rudder Kit For Kayaks
1) Attach Mounting Bracket
The first step in your kayak rudder kit install is to attach the mounting bracket. If your kayak has a designed area for a rudder, it will also likely have pre-drilled holes for a mounting bracket (usually covered by stainless steel screws).
If your kayak is not rudder-ready, then you will have to drill some holes yourself. Most people will opt for 3-5mm holes with 5-7mm screws respectively.
Ensure that all screws are tight once the bracket is in place. It will likely be watertight as is, but if you are concerned you can use rubber washers or some silicon to seal the bracket and screws.
2) Attach Rudder to Bracket
The next step in your build is to attach the kayak rudder to the bracket. Depending on what model you own, it may vary. But most kayak ridder kits, will slide the rudder into the bracket, and then it will be locked into place using a lock-pin.
You’ll know if you have installed the rudder correctly as it will not slide out, and still swivel from side-to-side.
3) Run The Lift Lines
Next, you will install the lift lines to the sides of the kayaks. The lift lines allow you to deploy and retrieve the rudder in the water.
You will run your cord through the kayak rudder bracket and down the side of the kayak. There it will be mounted to the side of the kayak using a bracket attachment (often included in your kit).
You will have two cord lines next to the cockpit, one for deployment and one for retrieval. Once you have checked that it is all working correctly, you will need to tighten and cut the line to the correct length. Top tip: Use a lighter to burn the ends of the rope to prevent any fraying.
4) Pedal Install
The pedal install is a key part of installing your kayak rudder kit, and extra care should be taken here. If your kayak already has foot pedals installed, you will likely need to remove and modify them to work with the rudder system.
Although, if your kayak has been designed to be used with a rudder system, the correct holes and attachment points may already be in place.
The pedals will be attached to the steering lines (next step), you will be able to either slide or tilt the pedals to pull on one side of the steering line at a time, this is what causes the kayak rudder to swivel.
5) Run & Attach The Steering Lines
Prior to running the lines through the kayak, measure the distance between the rudder and your pedals to gauge the length of wire you will need. You can pre-cut the wire, just ensure to leave a few inches on either end, which you can trim later.
To run your lines, you will need two holes in the stern of your kayak (the cable will pass through and attach to the kayak rudder system). You will also need two holes that come out near your foot pedals.
Running the line through the kayak and out of both holes can be tricky, it’s much easier if you have a storage hatch and can reach inside the kayak walls or your kayak has pre-installed inner lines. The best advice here is to be patient. you’ll get it eventually. Repeat for both sides.
6) Connect The Steering Lines
Once the steering cable has been run along both sides of the kayak, you should have four cut ends, two next to the foot pedals, and two next to the rudder.
Follow your specific ridder instructions to attach the cable to the pedals and the kayak rudder.
Ensure that it is all pulled tight, you can usually tighten the cable via screws on the rudder end.
7) Test It
Before heading out on your new kayak rudder kit’s maiden voyage, you should test everything out. Make sure the pedals sufficiently alter the direction of the rudder, and that the lift lines are tight and can easily lower and lift the rudder into position.
Kayak Rudder Kits FAQs

Can you add a kayak rudder kit to any kayak?
Some kayak manufactures will design a stern shape that is rudder-ready. Meaning that it has been designed to attach a rudder kit onto, or includes pre-installed mounting points.
Before buying a universal kayak rudder kit, you should always check if your kayak brand also makes a rudder kit for your specific kayak as it will no-doubt fit and perform better.
But, even if you don’t have a kayak designed for mounting a rudder to, you can get creative and mount your own. You can do this to pretty much any kayak, by using various shaped brackets/mounting points.
Alternatively, if you use a kayak trolling motor whilst fishing, you can purchase a kayak rudder kit that simply mounts onto the shaft of the trolling motor, which means no drilling, and mounting to the actual kayak – easy!
Is a kayak rudder worth it?
Kayak rudder kits are worth it. Especially if you have a long touring kayak that is easily affected by sideways winds and choppier water conditions. A kayak rudder will help you track in a straight line, and help to conserve your energy (less energy spent fighting the wind and currents).
Do you need a skeg on a kayak?
You don’t need a skeg on a kayak. Not all kayaks will come with a skeg, however for long sea and touring kayaks that are often used in windy conditions and strong currents a skeg will assist in keeping your kayak tracking straight.
What is the fin on a kayak called?
The fin on a kayak is called a rudder or a skeg. A rudder is often placed at the stern (rear) of the kayak and is lowered into the water using a pulley system. A skeg is also at the rear of the kayak, however, it is stored underneath the kayak, and retracts into the hull when not in use.
Final Words
Choosing the best kayak rudder kit isn’t always a straightforward task. There are many options to choose from, and finding a universal kayak rudder to fit your boat can quickly become confusing.
Luckily, hard shell kayaks are easily drilled into, and can be modified to fit almost any mounting bracket and rudder kit. Just ensure the holes and modifications are water-tight before heading out with your new rudder for the first time.
Installing a kayak rudder kit is a great way to improve how your kayak tracks in windy and choppy conditions. They also help to conserve your energy on longer trips.

![7 Best Fishing Pliers [In-depth Reviews & Buyers Guide]](https://watersportingadventure.com/wp-content/uploads/2020/10/pexels-shane-kell-2431454-scaled-e1602751936800-768x336.jpg)